

There are different ways to get started and cast on in crochet but so far this is the only one I’ve had any luck with. It took me quite a few tries to get to get to grips with the magic circle but once I had worked it out it made everything a lot easier and reduced my crochet tantrums.
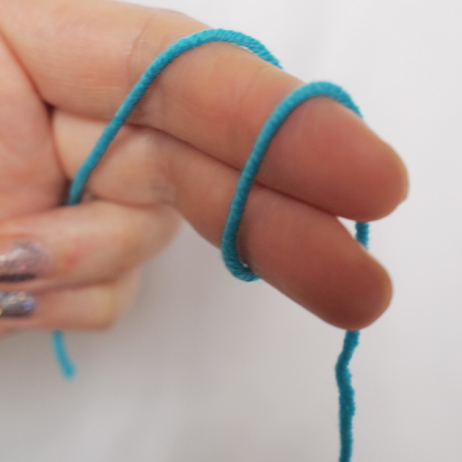
Step 1: Setting upÂ
 Â
  Â
 
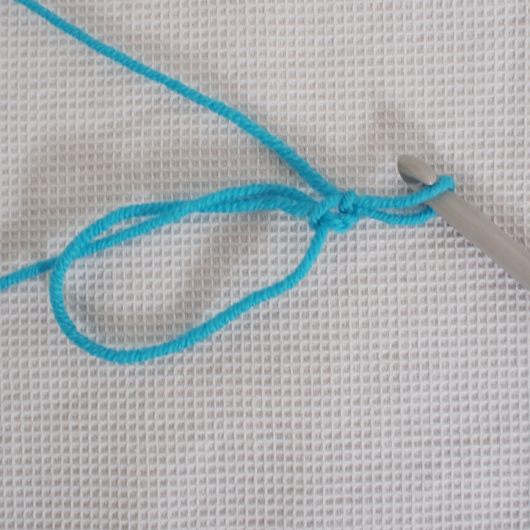
Create a loop with your wool as shown making sure the longer strand goes over and hangs behind the loop.
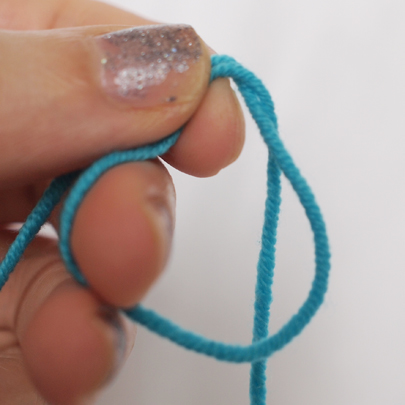
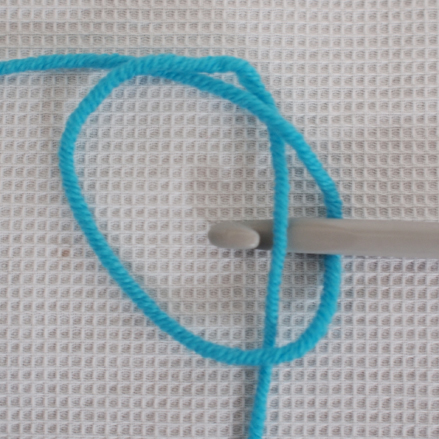
Step 2: The Crochet Needle
 Â
 
Put the crochet hook into the loop and pull the longer strand through from the back.
 Â
  Â
 
Bring the long strand behind the crochet needle, hook over the end of the needle pull through to create a knot. Tighten gently to attach the needle to the wool.
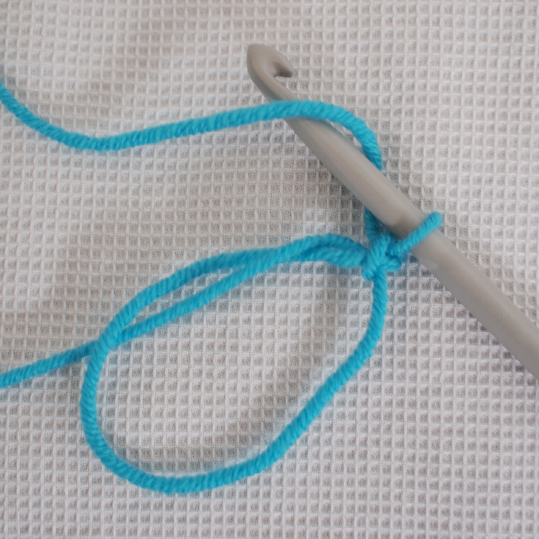
Step 3: The Chain Stitch
This is not counted as a stitch in your pattern, it is just needed to set up the magic circle.
 Â
Bring the wool behind and over the crochet needle. Pull through to create 1 chain. Tighten gently.
Step 4: Crochet Stitch
This is the first official stitch.
 Â
 
Put the crochet hook through the loop making sure that you are going under both strands. Hook the wool and pull it through (there are now two stitches on your hook).
 Â
  Â
 
Hook the yarn onto the crochet hook again and pull it through the two stitches already on the hook. Tighten gently and you now have your first crochet stitch, hooray!
Step 5: More Lovely Crochet Stitches

Repeat step 4 until you have the amount of stitches that you need. So far I have used 6 stitches to start all of my patterns.
Step 6: Magic!
 Â
Â
Pull the short strand firmly and as if by magic you have completed your magic circle.Â
I hope that this has made sense. Please use the comments box if you have a question or if you think I have missed anything out.